Table of Contents
Display Public IP Address of Remote Client in Grafana via Zabbix
This guide explains how to display the public IP address of a remote client in Grafana using Zabbix. The client updates its status using the Zabbix agent, and we'll utilize a PowerShell script to fetch the public IP address.
Step 1: Create the Zabbix UserParameter
First, create a configuration file for the Zabbix agent on the remote client. This file will define a UserParameter that Zabbix will use to execute a PowerShell script and retrieve the public IP address.
\\10.241.26.108\c$\Program Files\Zabbix Agent\zabbix_agentd.d\wan.conf
In the file, add the following line:
UserParameter=address.WAN,powershell -File C:\temp\get_wan_IP.ps1
Step 2: PowerShell Script to Get Public IP Address
Next, create the PowerShell script that fetches the public IP address. Save it in `C:\temp\get_wan_IP.ps1` on the remote client.
$wc = New-Object System.Net.WebClient
$wc.DownloadString("http://ifconfig.me/ip")
This script downloads the public IP address from `ifconfig.me`.
Step 3: Create the Zabbix Item
In Zabbix, create a new item for the client to fetch the public IP address.
- Go to Configuration > Templates.
- Search for the template Windows by Zabbix agent.
- Click on Items and create a new item.
Use the following parameters:
- Name: WAN Public IP Address
- Key: address.WAN
- Type: Text
- Tags: network:publicAddress
Save the item.
Step 4: Display in Grafana
Finally, we will display the public IP address in Grafana.
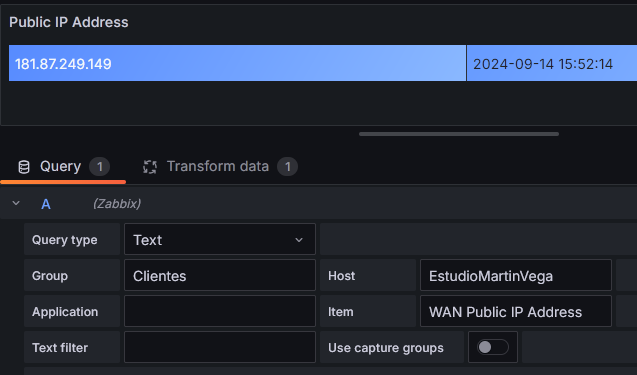
- Open Grafana and add a new Visualization.
- Select Zabbix as the data source.
- Choose Query Type as `Text`.
- Use the item tag (e.g., `network:publicAddress`) to filter the correct item.
Since the item data type is text, Grafana will display it as a text field.
Conclusion
By following these steps, you can monitor and display the public IP address of a remote client using Zabbix and Grafana.